Initial Setup
Once Pyxsoft Firewall (PXF) has been successfully installed, it starts in a safe, non-blocking mode to prevent accidental service disruption. Follow the steps below to complete your initial configuration.
1. Default State After Installation
After installation:
- The firewall is disabled by default — no ports or IPs are blocked.
- The
pxfservice is active and enabled to start automatically at boot. - All ports are temporarily open, and the system operates in a permissive policy (allow all incoming and outgoing traffic).
This ensures that your server remains fully accessible while you review and confirm the configuration.
2. Accessing the Web Interface
- Log in to WHM using your administrator credentials.
- In the left sidebar, navigate to Pyxsoft Firewall.
3. Initial Configuration Screen
You will be greeted by the main configuration dashboard, which lists all the essential ports required for cPanel and WHM to operate correctly.
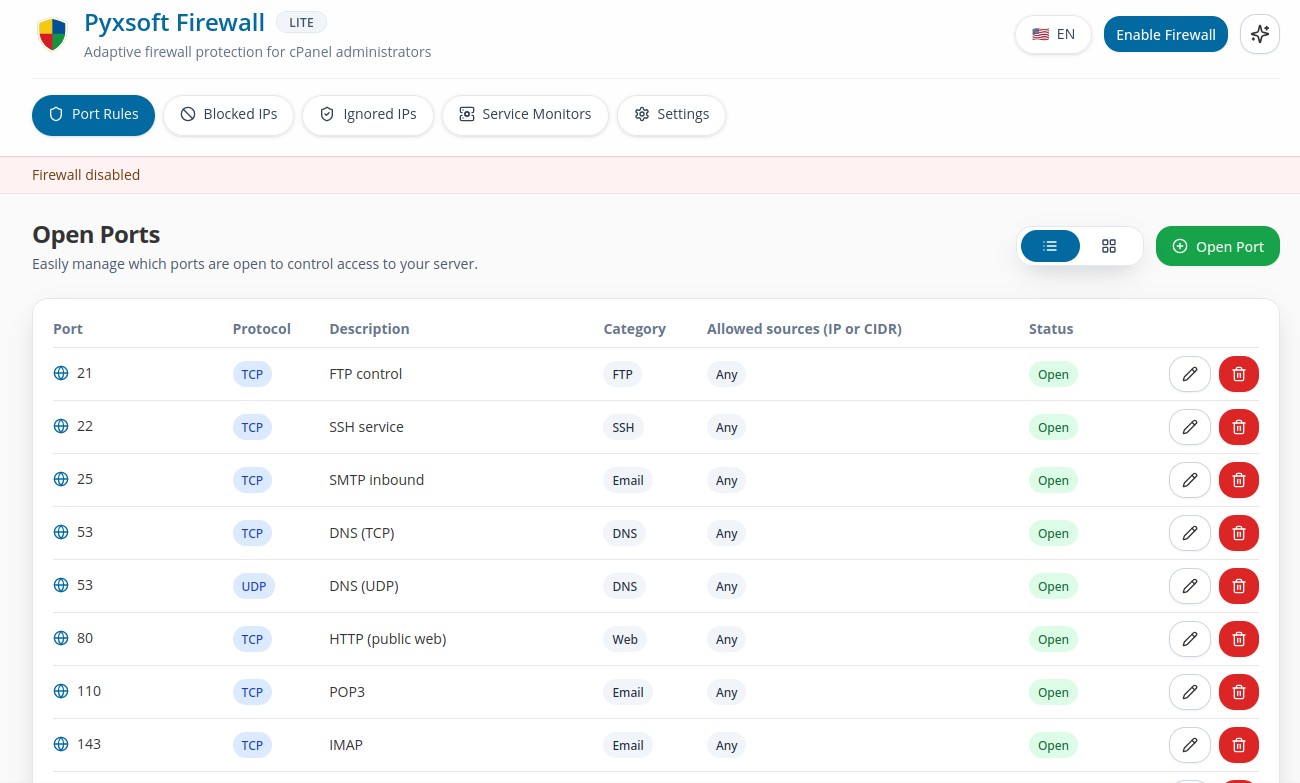
Description:
The initial screen displays a list of ports that PXF automatically detects and allows by default.
Default Allowed Ports
| Service | Ports | Notes |
|---|---|---|
| cPanel / WHM / Webmail / WebDAV | 2077, 2078, 2082, 2083, 2086, 2087, 2095, 2096 | Core web management ports |
| SSH | (autodetected) | The SSH port is automatically detected during installation |
| DNS | 53/tcp, 53/udp | Required for DNS resolution |
| Mail Services | 25, 465, 587, 110, 995, 143, 993 | SMTP, POP3, and IMAP |
| FTP | 21 | FTP control port |
| FTP Passive Range | (autodetected) | Detected automatically from Pure-FTPd or ProFTPD configuration |
4. Enabling the Firewall
Once you have verified that all required ports are listed and correct, click Enable Firewall.
- Pyxsoft Firewall will immediately close all ports not listed above.
- Only the allowed ports will remain open.
This ensures your server is now protected according to your confirmed configuration.
5. Test Mode
When first enabled, the firewall automatically starts in TEST MODE.
- This mode allows you to verify that all your services continue functioning correctly.
- After 2–3 minutes, the firewall will automatically disable itself to prevent accidental lockout.
You can enable it multiple times while testing and fine-tuning your settings.
6. Final Activation
Once you have confirmed that all necessary services work properly:
- Re-enable the firewall.
- Disable TEST MODE from the interface.
From that moment on, Pyxsoft Firewall will remain permanently active, enforcing your configuration and securing your server.
Always verify that your SSH port is listed before final activation to avoid losing remote access.
7. Disabling notifications
Receiving too many email notifications?
To disable them for a specific service, go to Pyxsoft Firewall > Service Monitors in your WHM interface and :
- Select the service you want to configure.
- Turn off the "Send Notifications" option.
This will stop email alerts for that service. Repeat with all services you want to disable. (more services coming soon)
8. Working with pxShield (WAF)
If you also run pxShield on the same server, the two products coordinate automatically through PXF's extension hooks. When pxShield's systemd unit starts, it deposits a hook script in /etc/pxf/post-apply.d/50-pxshield.sh (and an identical copy in /etc/pxf/post-disable.d/). From that point on:
- Every
pxf applyre-installs the80 → 19080and443 → 19443redirects so traffic continues to flow through pxShield's WAF. pxf disableflushes the rule set and switches to ALLOW ALL, then runs the post-disable hook to restore the WAF redirects. This means the WAF stays in front of HTTP/HTTPS traffic even if you disable PXF temporarily.- If you want a true killswitch that opens everything, including the redirects, use
pxf disable --no-hooks. - When pxShield is stopped or uninstalled, its
ExecStopPostscript removes the hooks and triggers a freshpxf apply, leaving the firewall in a clean, redirect-free state.
You no longer need to configure anything manually for the two products to interoperate; the hook is shipped with pxShield and managed by its service lifecycle.